This article is in continuation with the https://www.amarmn.com/sap-appgyver-display-list-consuming-northwind-odata-service/ where we displayed the products list. In this example we will add another page, detail page and navigate from list page to detail page when clicking on a product.
- In the UI Canvas tab, click empty page and choose ADD NEW PAGE to create a new page.
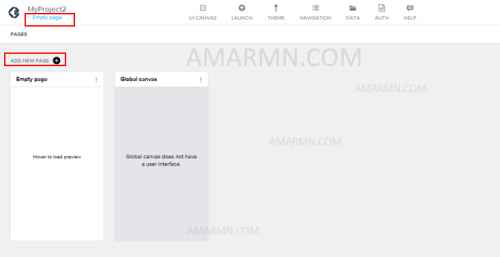
- enter name Detail and click ok
- We get a new page Detail. In the UI Canvas tab, drag and drop some text UI into the canvas.
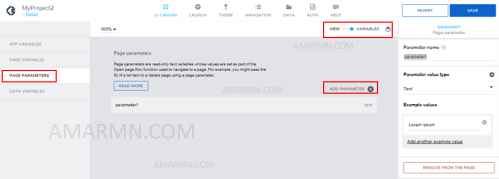
- Next, toggle from View to Variables. We will create PAGE PARAMETERS to receive data from list page to detail page. Click ADD PARAMETER to create a page parameter.
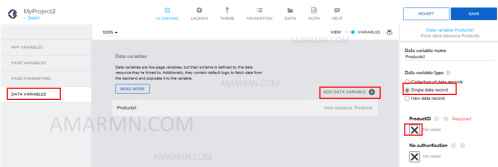
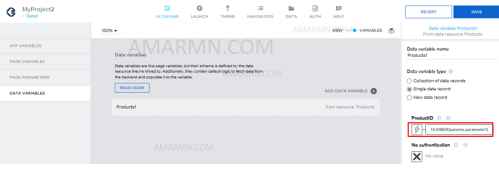
- Based on the value of Page parameter, we will fetch data from OData service. So we need to create a Data variable that will store the data fetched from the Odata service.
- Choose Data variables, click ADD DATA VARIABLE, and choose Products. A data variable Products1 is created. Change the Data variable type to Single data record (we intend this data variable to fetch a single record from the odata service).
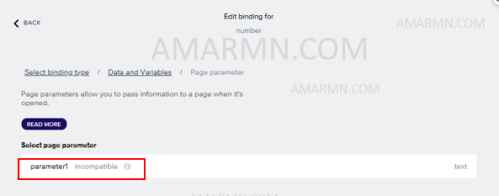
- Next we need to bind ProductID with the page parameter. Based on this data, the product details will be fetched from the odata service.
- Click on Product ID, in the binding window, choose Data and variables -> Page parameter.
- Here we see that we cannot do this binding, because the type text is incompatible with the type number.
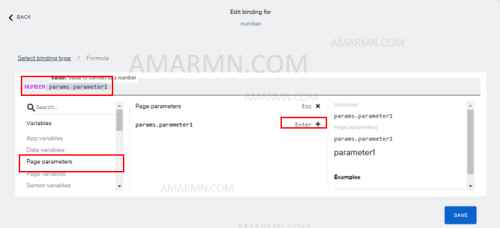
- In order to solve this, we will have to apply formula. Hit back twice to come back to the first page of binding wizard. Choose formula, click Create formula.
- In the search box, type number to get the number function. Choose number function. For value, click Page parameters, choose params.parameter1. Click Save to create the binding.
- We see that the binding is created. Click Save to save the development.
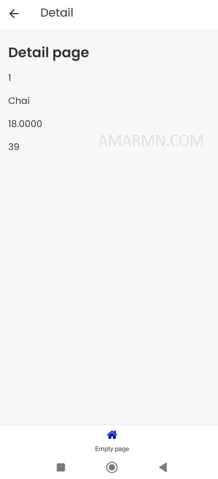
- Toogle to view. In the Detail page canvas, drag and drop text UI element. Make sure that you have at least 4 text UI elements in the detail page.
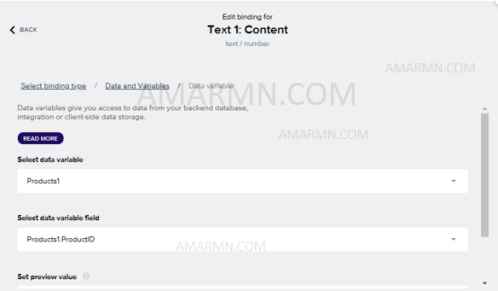
- Choose the first text UI element. Under Content, click icon to create binding. In the binding window, choose Data and Variables -> Data variable -> Products1 -> ProductID to do binding with ProductID. Click Save to complete the binding.
- Similarly, bind other text UI elements with ProductName, UnitPrice and UnitsInStock respectively. Click Save to save the development.
- Next, switch the list page.
- We need to add a logic, if anyone taps a record on the list, then we must navigate to the detail page.
- Choose list.item1. At the bottom, click Add logic to LIST ITEM1.
- The logic window expands. We see event Component tab. From left, under navigation section, drag and drop Open page in to the logic canvas.
- Connect dot from Event Component tap to Navigation Open page.
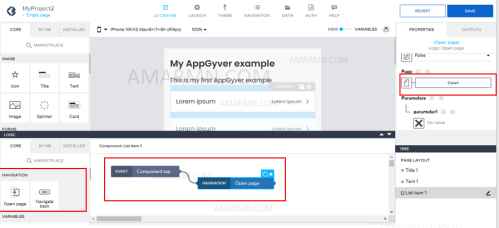
- Also, check that the Open page is connected to Detail page.
- Next, the parameter of detail page is to be binded to the list ProductID so that the ProductID value flows from the list to the detail page parameter.
- Click paramter1 binding, in the binding window, choose current ProductID. If you get incompatible error, click back in the binding window. Choose formula -> create formula.
- Type string to get the string formula. For value choose Currently repeated data items -> repeated.current.ProductID. Click Save to save the binding.
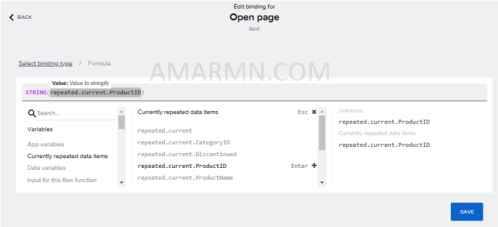
- String formula converts number to text.
- Save the development.
Now, we can test the output of the above app. When we tap on the list, we see the detail page.