You are a beginner to web development and you are looking for creating your first project using NextJS. So, here, I am will not discuss what is NextJS and will take you directly to the steps to setup and create your first NextJS project.
Prerequisites
To get started, you need to have the below two software installed on your system:
- Node.js (version 18 or later recommended)
- VS Code ( a popular IDE )
- npm or yarn (Node package managers)
Installing VS Code
Installing VS Code is super easy. Head on to the website Visual Studio Code – Code Editing. Redefined homepage. Download the software.
Follow the usual steps of installation to complete Visual Studio Code installation.
Installing NodeJS
We need to download Node.js and install it in our system. Browse to Node.js — Download Node.js®

Choose the latest LTS ( Long-Term Support ) version of Node.js available. For it is a Windows system. Download and follow and the usual process of installation.
Verify your installation by running:
Shell -> node -v

We see the version of NodeJS installed. This indicates that NodeJS is installed with no issues. Cool enough.
🚀 Step 1: Create a New Next.js App
Head on to the terminal of VS Code. Next.js provides a quick setup tool called create-next-app. Open terminal in VS Code. Switch to Command Prompt and eneter the command and hit enter.
npx create-next-app@latest
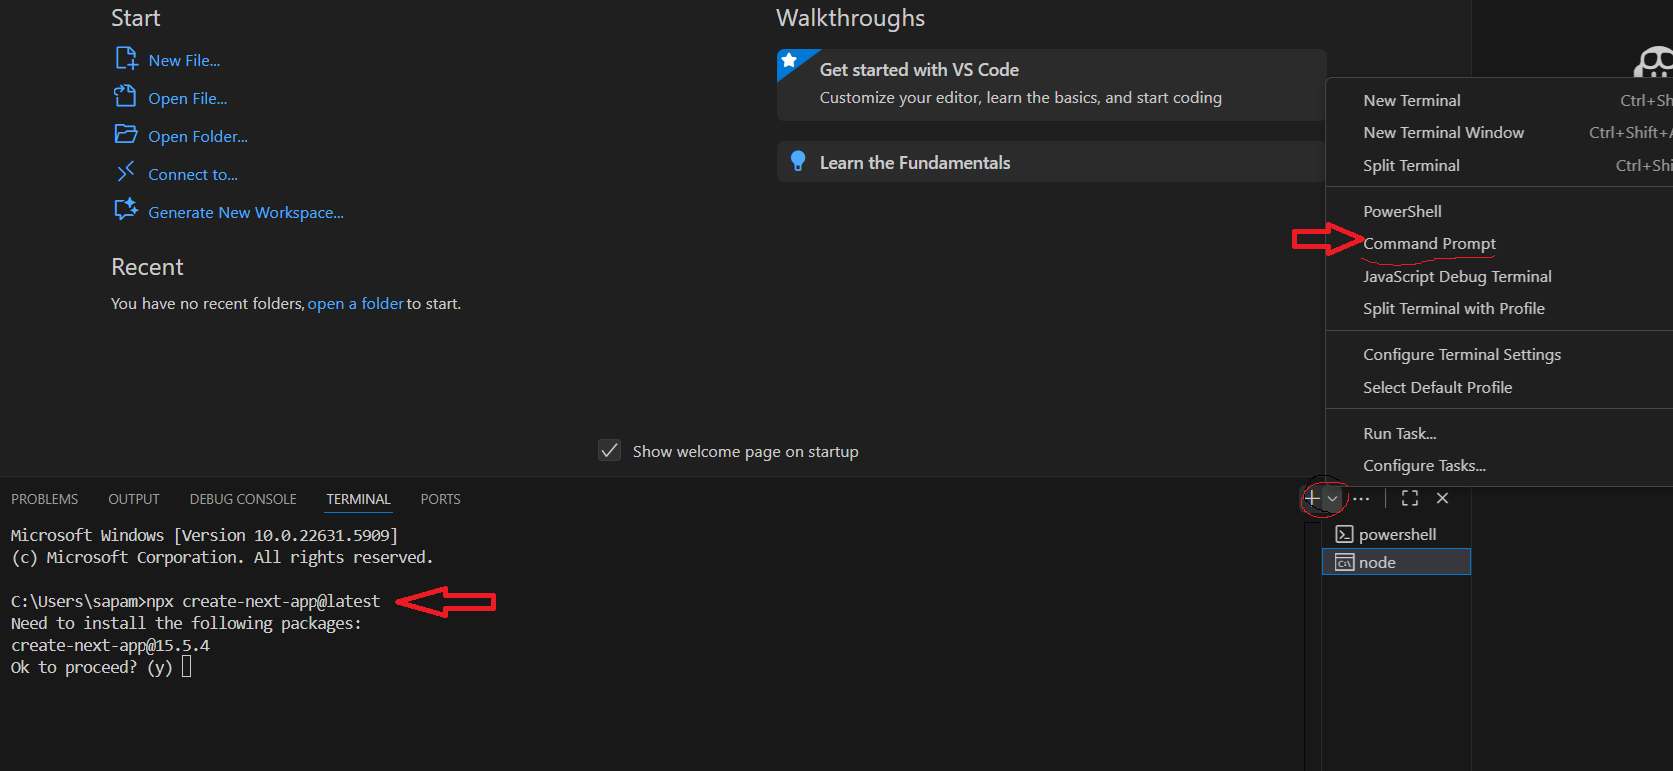
As it is first time create-next-app is executed on this computer, it will prompt to install Next.js.
Ok to proceed? y
Next, You’ll be prompted to choose options for creating and configuring the project:
- What is your project named? asimple-nodejs-project
- Would you like to use Typescript? No
- Which linter would you like to use? None
- Would you like to use Tailwind CSS? No
- Would you like your code inside a ‘src/’ directory? Yes
- Would you like to use App Router? No
- Would you like to use Turbopack? No
- Would you like to customize the import alias (
@/*by default)? No
Post these prompts, the creating of a new Next.js app starts. If all is good, you get a Success with 0 vulnerabilities.
📂 Step 2: Navigate to Your Project Directory
Once the setup is complete, move into your project folder:
>cd asimple-nodejs-project
🧪 Step 3: Run the Development Server
Start the development server to see your app in action:
>npm run dev
Visit http://localhost:3000 in your browser. You should see the default Next.js welcome page.
🛠️ Step 4: Start Building Your App
Now you’re ready to build! You can:
- Edit
app/page.tsxorpages/index.jsdepending on the router you selected. - Create reusable components in the
components/folder. - Use
next/linkfor client-side navigation andnext/imagefor optimized images.
📦 Step 5: Install Additional Packages (Optional)
Enhance your app with useful libraries. For example:
>npm install axios
>npm install tailwindcss postcss autoprefixer
📤 Step 6: Deploy Your App
The easiest way to deploy a Next.js app is via Vercel, the creators of Next.js. Run:
>npx vercel
Follow the prompts to link your project and deploy it live.
🎯 Final Thoughts
Next.js framework speeds up the development process by providing may built-in configurations for routing, server-side rendering, and performance optimizations. With just a few commands, you’re ready to build powerful apps that scale.
